Just Trying to Keep These Kids Alive

160628 Painting

For the past few years whenever I photographed the house I could do it at such an angle that it looked pretty good.  The shed had been rebuilt and painted and so had the front.  The gable ends were a different story.  We’d talked about getting a high lift for the job but even in one of those it’s pretty high up there.  Then there is the square footage that needed painting.

We’re not painters.  In our younger years we painted because we had to and I can truly say I didn’t enjoy a single minute of it – especially exterior painting.  We decided to hire a company that works with college kids for the summer.  The kids are local but they have to play by the rules which gets me to the ranting part of this blog today.

By law in Massachusetts if the building where paint is to be removed was built before 1978 it is assumed the paint is lead based.  If you are a contractor doing the work every chip has to be accounted for and if, God forbid, it touches anyone’s skin they could be poisoned.  This law, in my opinion has put these kids at extreme risk in their jobs.  As you can see from the photograph they are wearing hooded coveralls, booties, respirators and goggles.  I should also tell you they began work at 7 A.M. and finished around 4:30 P.M.  It was over 85 degrees and the humidity was over 90%.  The booties they wear have nothing on the bottom of them that prevent slipping so they climb up and down an aluminum ladder that is pretty slick.  One false move at the top of one and we’re talking bad, bad news here.

My first thought when I walked out to see their progress was “I hope to God they have amazing liability insurance.” My second was to make sure they had enough water.  It was so hot.

They scraped all day with the paint landing on the plastic they had carefully laid over the vegetation near the house.  At the end of the day they used a shop vac to pick up anything that was in the grass.  At least they took the hoods off to do that.

They told me over the weekend and yesterday morning that they had estimated 24 man hours to scrape both ends of the house – I laughed.  A little over ambitious was my replay.  All day 4 of them scraped and just about finished one side with the idea being today two of them would prime while two worked on scraping the other side (you must have a lead abatement person present whenever paint is being removed).

It poured rain last night (much, much-needed I might add) and threatened to do so this morning so painting was out.  One of the kids was sick overnight (my guess was heat stroke) and they decided to put it off until tomorrow.  Maybe it’ll cool off and they will have recovered.

Want to know the worst part of this story?  If we had decided to paint it ourselves we do not have to adhere to the MA law, we wouldn’t have to suit up.  Even worse? All of the exterior wood was replaced on the house in 1984- there isn’t any lead paint on it.

No Place for Old Men

There are projects around here and then there are the PROJECTS.  The jobs that require a lot of planning and thinking and some hesitation to start because you know they are going to turn into something unexpected halfway through.

All of the buildings on the property seem to slide in an easterly direction toward the wetter area of the pasture, a slight decline in the topography of the area.  For years we just referred to it as “heading for the swamp”.  The building that houses our woodshop has been heading that way for a good number of years.  It has a dry stone foundation that has collapsed in some areas to the inside of the building leaving it to rest on corners with big, gaping holes looking underneath.

The plan was to do this project last year but time got away from us (and there was no small amount of trepidation at the thought of how much work this was going to be).  You have to do a lot of thinking when it comes to these things.  Bill and Mike made plans to begin yesterday and now we’re in deep.

The land here is nothing but stones (huge ones) and it’s a known fact going in that digging is going to be a problem.  These two guys attacked the under side of the foundation with shovels early on in the morning and quickly realized they were going to need a little help.  Up the road one of our neighbors is one of the best backhoe operators I have ever known.  In his 70’s now he is still working his magic with the famed piece of equipment.  A quick trip up the road brought him down to start digging, saving hours of back breaking work and he left with a dozen eggs.


With the corner dug out raising the building was the next thing on the agenda.  Blocking and jacks were put in place.

IMG_0425

This is the sort of thing you need to ponder – think through all of the ramifications.  There was the possibility of an avalanche of stone with the raising of the building.

IMG_0434

They raised it just enough to push the stone through and pull it out from the other side.

IMG_0438

Back breaking work.

IMG_0444

I am surprised at how smoothly this went.  Of course I wasn’t the one moving stone.

IMG_0447

And the work for the day ended with pondering the next phase.  Making mental lists of the order of things.

IMG_0450

A good portion of the sill will have to be replaced, there will be footings poured, some blocks brought in.  The stone foundation will be rebuilt. Blocking was put in later in the day to stabilize the corner where a hydraulic jack was used.  Materials were purchased and everything readied for Monday.

These old post and beam buildings are so amazingly strong.  Even if the jacking in the corner let go I doubt that it would have much of a consequence unless left over time.  The best part of seeing this unfold was going into the shop and immediately noticing the difference – things were straight, no more floor sagging to the northwest.  Ahhhh.

The other thing is watching New England men, of an older generation, thinking, pondering, discussing each step as they went along.  You don’t want to rush into any of this.  I think by doing so they also prevent injury – taking the pace slow, drinking lots of water, moving a little at a time.  Slow and steady.


Old House Responsibilities

Owning an old house comes with certain responsibilities, at least I’ve always felt that way.  We are currently responsible for two, each in a vastly different time period.  The newest one was built in 1840.  As you know the house at Fort Pelham Farm was built around 1800.

Over the years I’ve done research about its past occupants – more or less a genealogy since it remained in the same family until 1941 with the sale of the house.  It’s easy to make assumptions about why the house left the family.  Olive was the last child of a long line of occupants and with no children of her own the ownership would eventually leave the family anyway.

Sale of House 1941

Olives parents had moved away from farming for the most part by the time the property went up for sale.  They were taking in borders who enjoyed the summers in Rowe and were also feeding people their chicken dinners – a sign for that remains in the museum.

Olive died in 2001 and two of her photo albums made their way back to Rowe.  I scanned each page that she had lovingly put together and it was easy to tell what a loss the sale of the property had been to her.  There was such great pride at being part of that family history.  She had marked almost every photograph and written her family history on the back of one.

As anyone who has owned a house of this age knows the upkeep on a house this age can be overwhelming at times.  For me one of the biggest challenges is how to keep the historical aspects of the house while maintaining its livability.  No easy feat.  More often than not the only thing you have to go on is research on other homes built around the same time period, some old photographs and the knowledge of historians that have gone about the restoration of other properties like yours.  For me there have been a few aha moments – one of which was the albums resurfacing.

There were a number of photographs taken of the interior of the house showing various furnishings and how they were set in the living room.

Dining Room at Fort Pelham Farm 1930's (7)

After looking at these it kind of sent me on a mission to find similar pieces into order to fill this room as we renovated it.

Dining Room at Fort Pelham Farm 1930's (6)

Any reader out there that is remotely engaged with antiques will readily recognize that without an unlimited budget this was never going to happen.

A few weeks ago there was a message on my answering machine from a man who told me he had furnishings that originally belonged to Pardon Haynes family.  When I called he explained he was the nephew of Olive’s through her husband and had inherited her furniture when she passed away.  He felt the furniture and other belongings should make their way back here thinking that Fort Pelham Farm was part of the Rowe Historical Society.  He was having them appraised and then would donate them for the tax write off.  I told him I would pass the info along to those who could help him.  When I did I found that he had already contacted someone at the museum.  I was relieved.

In talking with a couple of members of the society the excitement about this donation was palpable.  I cannot wait to see and touch these things.  I feel like there would be some sort of unseen connection to the past.  The spirits of this house lived with those things, used them, treasured them, passed them down.  I know they are inanimate objects but having lived in this house I know it’s the way it is because of the people who have lived here.

I do know that space is tight at the museum and offered to keep furnishings in the house they originated in – willing to insure and keep the house open to anyone that wanted to view and study them.  One woman said the museum could always sell them.

Uhm . . .

So at this point I just hope someone will let me know if and when they arrive so I get a chance to photograph and study them.  And touch and imagine what they might have looked like in the very room I’m writing in now.

The Spirit of a House

Fireplace Before

As the renovation project continues I’ve spent a lot of time on a ladder, paintbrush or putty knife in hand, thinking.

We moved into this house in 1967 when I was 11 years old.  We drove by this house every Sunday for years before because my mother lusted after it in a huge way.  Why, I do not know and never will.

On moving day we were allowed to pick out our bedrooms (although I have an idea they were already picked out for us).  The exception being the room I’m currently doing which is adjacent to the bathroom.  The master bedroom, also known as the creepiest room in the house.

I believe an old houses has a spirit that is palpable when you walk into it.  I think it’s part of the appeal to those of us who live and love these old places.  We can feel the lives that have been lived in them.  The house in Enfield is truly one of the happiest buildings I have ever been in.  Friends have commented on it and it’s the reason we fell in love with it.  Good things had happened in that place over it’s 176 year life.

The house on Fort Pelham Farm is not the same kind of place.  I felt it the minute I walked in 48 years ago.  It has some bad juju and we all know it, just ask my siblings.  I’ve done the genealogy of the place trying to figure out what could possibly have happened here that could give it such a sad vibe.  You know, it’s not just sad, it’s a little angry as well.  I’ve never found anything in particular and sometimes think it’s spirit comes from neglect or “improvements”done by people who knew not what they were doing or were just plain lazy.

Bill and I have done a lot to this place over the past few years.  In the back of my mind I’m hoping that renovating in a thoughtful way will help to disperse some of the bad vibes that have been felt here over the years.  The living room, with its 3 year project coming to a close was the scene of friends dancing on its expansive floor before furniture was returned.  Walls had been replaced, sanding, painting and general TLC had come to an end with a smudge stick of sage from the garden burned to exorcise the demons.  I truly believe the act of lovingly breathing new life into the building itself helped its spirit.  That and lots of laughter with family and friends.

Upstairs the woodwork has been painted, the plaster patched, the wallpaper begins to go up today.  Just painting has made the room feel lighter.  I think as we continue to improve the structure itself and bring in laughter and love the spirit of the place can change.  Once the garden is in full swing I will also be rolling a couple more sage smudge sticks because you never know.

Let A Renovation Begin (Or I Must Be Out of My Mind)

(1)

If you own an old house and are used to doing your own renovations this will ring true with you.  A few months ago I was moving things around in the upstairs rooms and cleaning out some closets with a shop vac when I accidentally got too close to the wall and ripped an entire, full sheet of wallpaper off of the wall.  Yeah, too close with the vacuum.  What started out as an accident turned into a minor obsession.  I stripped two walls in as many hours.  Wallpaper never comes off that easy unless it’s 50 plus years old (probably much, much older) and is adhered to a horsehair plaster wall.

Fireplace Before

With winter upon us and no heat upstairs for the most part I walked away from it.  Today I stripped the rest of the paper off and took a good hard look at the condition of the room.  It’s not pretty.

(3)

Water damage to the walls and ceiling on the west wall.

(2)

The plaster around all of the window trim is in pretty bad shape.  And what is up with that nail in the first photo?

(4)

There is some serious cobbing done on the wall over the doors on the east side.  The paper in between won’t come off because it’s some foreign substance not even related to plaster.  The woodwork around the door on the left was added after the papering was last hung (wonder what was there?). The plaster over the door on the right is ready to just fall off, but as you know dear friends horsehair plaster doesn’t just fall off.  It’s never that simple.

Now I have to call in my plaster expert to see what he thinks about this mess.  I’m at a bit of a standstill, at the same time it feels like I’m moving forward.  Never underestimate the power of a sunny day to motivate me into a project.  It might have been better if the yard was without snow – I might have just dug in the dirt.


The Pantry

140404 Pantry

I finished building and painting the shelves for the pantry.  The painting was fine but the building was not without its cursing.  There is nothing like trying to fit something that’s square into somethings that’s not.

Sunday I moved a few things into it but will work on that in earnest this week.  There is still the pantry closet to build that will be going in on the end of this in what was once a shower stall.  The floor will then get another coat of paint.  That will have to wait for a few weeks since there is another room that needs finishing.

This is the perfect solution for the time being.  Eventually this room will be going away to make room for a kitchen expansion but for the time being a little paint and elbow grease has made it into something functional.  It’s kind of amazing how you can use a little imagination and come up with this.  Remember this is how it started out.

140308 Bathroom to Pantry (4)

One project down, thousands more to go.


Stripping

140330 Heat Gun

I have done my share of stripping paint over the past few years.  When your house is over 200 years old there are always more than a few coats of paint on the woodwork.  I have used strippers and they are pretty caustic and never give me quite the results I expect.

My brother-in-law is a painter, glass blower, jack of all trades kind of guy and he is always giving me tips on how to make my renovation projects easier.  A while back he told me he had started using a heat gun to strip the moulding in a house about the age of ours and the results were amazing.  I had Bill get one through the tool guy at the shop and began my first project of stripping the paint off of the floor in a bedroom upstairs.  The result was nothing short of amazing.

I didn’t fully appreciate how amazing this tool is until I began stripping this door yesterday.  This is one of the doors to the library that has been painted at least 5 times, the last coat being latex (which is a totally different issue).  Most of the paint when heated just popped right off in huge flakes.  It was a mess to clean up but I had most of one side of the door stripped in a matter of a few hours.  Mind you this needs to be done in a room wide open to the outdoors with an exhaust fan going.  Fortunately yesterday was above freezing.

This door has some holes that will need repairing.  The hinges and thumb latches need to be replaced as well.  Williamsburg Blacksmiths is a local forge that produces the reproduction hardware for this period home using the same methods probably used when the originals were made.  They are perfect.  Hopefully by the end of this week I will have this door done and be working on the other.  Then onto the door casings.  Both of the doors in the room do not close so I’m hoping taking them down, stripping them and rehanging with new hardware will fix the problem.  My sneaking suspicion is that a lot of it has to do with the paint, but new hinges will certainly help.

The photograph was originally taken for the 100 Happy Days project I’m working on with a number of family members.  I was thinking how happy I was to be using this tool but the more I thought about it I realized that when you’re stripping woodwork the only happy part is when you’re finished.

Ch-ch-ch-ch-Changes

There is a lot going on in the house at Fort Pelham Farm.  We decided to turn the old bathroom into a pantry for now and the library will become a bedroom for my Dad who will be moving home in about 6 weeks.  Yes, you guessed right, I will be in Rowe full-time starting in May.  Not exactly the circumstances I had always envisioned but right now it is what it is.

140308 Bathroom to Pantry (4)This is the lovely bathroom that we used for years and years.  It was time for it to go and boy was Bill excited about this project (not).

140308 Bathroom to Pantry (7)He pointed out that this is the glory part of home improvement – removing the toilet.  Chester is making sure he is doing it properly.

140309 Bathroom to Pantry (1)Okay, I primed everything – don’t judge, we still have a ways to go.

IMAG0577Initial painting is done – the shelving I will be building this week.  Another coat of paint still on tap but the project is moving along.

Did I tell you that I have dozens and dozens of jars of canned goods sitting on the floor in the living room right now with no home?  Yeah, nice decor.  That’s because they were stored in the library.  All of that shelving had to come down to make room for Dad on the first floor.

IMAG0580Hello old friends – haven’t seen you in quite some time.

IMAG0579Before.  These shelves were built in 1985 to replace the shelving that was there when we moved in.  I’m assuming that was done because the room had lathe and plaster and it was what was the back of the bookshelves.  Originally the shelves were on two walls in the room with a window seat under the north window.  IMG_0191

It took Mike and Bill all of about an hour to get this out of there. You will notice that Chester is always in the middle of things.  I personally think he just likes having his picture taken.

IMAG0585Another work in progress.  Mike will be repairing the walls and fixing the ceiling.  The floor will have to wait, it’s too big a job for our time constraints.

I have to say that I’m not fond of renovation projects with a specific time deadline.  Things are not done the way they should be, they are done in the quickest way possible.  The pantry started out as a project for me.  A temporary fix in a space that was not being used.  The eventual plan with that room is for the walls to come down and have it be part of a more open kitchen – that’s down the road a bit.  Kitchen remodeling is not for the faint of heart.

The other fact pushing this project along is we know spring will get here at some point and when it does we will not want to be spending any time indoors.  While the weather is still wintry we can at least feel like we are getting something done.

It’s Always Something

140301 RadiatorThere are decided disadvantages to not living in a house full time.  There are squirrels moving into the shed, spiders just taking over each and every room and pipes freezing during subzero nights.  Yeah, the photo pretty much says it all.

This winter is one that will be burned into memory.  It has been harsh.  The cold has been unrelenting.  The roads are heaved and full of pot holes, the house has heaved enough to cause problems closing outside doors.  The oil truck visits weekly, I swear, and there is no end in sight.  Sigh . . .

The issue with the frozen pipe reared its ugly head on Friday – I came up early to warm the house.  I lit the stove and then looked at the temperature in the room to watch it rise – it was 46 degrees in the room with the thermostat set at 54.  Uh oh.  I turned on the water in the sink – nothing.  Beautiful.  I just cranked up the wood stove thinking that I could at least warm the room enough to thaw out the water.  We have a propane heater that we put in the shop to thaw it out another time and that was turned on once Bill arrived later in the evening.  Then we waited.

Saturday morning in the light of day Bill saw the hole in the radiator and called our heating guy.  He lives in town and probably the sound of desperation in our voice sent him over within an hour.  We had put enough antifreeze into the heating system to keep it liquid to 20 below so this came as somewhat of a surprise to us.  Apparently the pictured radiator had been leaking slowly for that past month or two (maybe longer).  The system has an automatic fill on it so when the liquid gets low it automatically refills it.  Enough had leaked so the water to antifreeze level was lowered considerably and it was diluted enough so on a night where the temperature was -8 and the wind coming out of the north the system froze in a room with little insulation.

The fix was something we had been talking about but had put off thinking the antifreeze was the answer.  We rerouted the circulation to a shorter loop that no longer went to the outer room.  In the long run this appears to have been the best solution, now the heat works much better in the kitchen. Unfortunately it took a lot of worry and angst to get us here.  Now I can check that off of the list.

Here’s the thing, it’s always something.  Each and every week there is some disaster (or impending one) whether it’s winter or any other season of the year.  We are caretakers of two very old houses (the newest one being 175 years old).  Things happen, and they happen regularly.  We signed on to the old house thing a long time ago knowing what we were getting ourselves into.  Plans are made for major repairs but it’s this sort of thing that often supercedes those renovation plans.  You end up doing a lot of seemingly little things because of the immediacy of the situation.

Spring is coming.  Really, it will get here and I have a feeling it will be about two weeks long and we’ll be into summer.  Then we can complain about how hot it is and I’ll be thinking about that insulation that needs to go into all those places before next winter gets here.


Another Home Improvement Project


Saturday morning Bill and I took a ride to Friends of the Sun in Brattleboro, VT to purchase a wood stove for the kitchen.  I had done some pretty extensive research over the past few weeks figuring out what would be the best option for us.  The stove would be mounted on a 9″ raised hearth with the hookup using the fireplace and chimney.  The fireplace, as beautiful as it is, has not been something we can really use for heat, or anything else for that matter.  When my parents had it built in the ’70s the chimney was not built to the same height it was originally.  Any time we used the fireplace we ran the risk of the wind blowing from the west, over the top of the house and directly down the chimney.  I once had to move a blazing fire into another fireplace because the smoke and ash suddenly blew into the kitchen.  Many times I woke up in the morning to a kitchen with everything covered with ash.

We decided on a Hearthstone Hearthmount.  It’s a soapstone stove which is something I have always wanted because of its heat retention properties and its beauty.  When we arrived at Friends of the Sun the stove was sitting right in their showroom and we soon found out they had one in stock.  I had anticipated having to order it so this was a bonus.  Although after a look in the warehouse our salesman told us we would probably have to wait until next week to pick it up because their warehouse guy wasn’t in and it was in an odd location.  He set us up with the materials for the chimney installation and sent us with the owner to pick up what we could.

131116 Stove (1)This set up is going to solve a bunch of problems.  It will keep the chimney dry and we will be able to heat the ell with wood.  The box consisted of 25′ of stovepipe, along with insulation and a cap.  It all seems so simple and easy when you are picking up the parts.

I swear the owner of this business is Mr. Rogers incarnate.  If he’d been wearing a cardigan it would have been perfect.  Their warehouse is a small, packed little building a short drive down the road from their showroom.  When we got there Mr. Rogers informed us that he could get the stove out for us if we wanted to take it right then.  Woohoo!

131116 Stove (2)

So after moving some things around it was taken off of a rack. . .

131116 Stove (3)and loaded into the truck.  We tied a couple of things down and made the trip home.  Oh, did I mention that the stove weighs 440 pounds?  Hmmm, think about that for a minute.

131116 Stove (4)
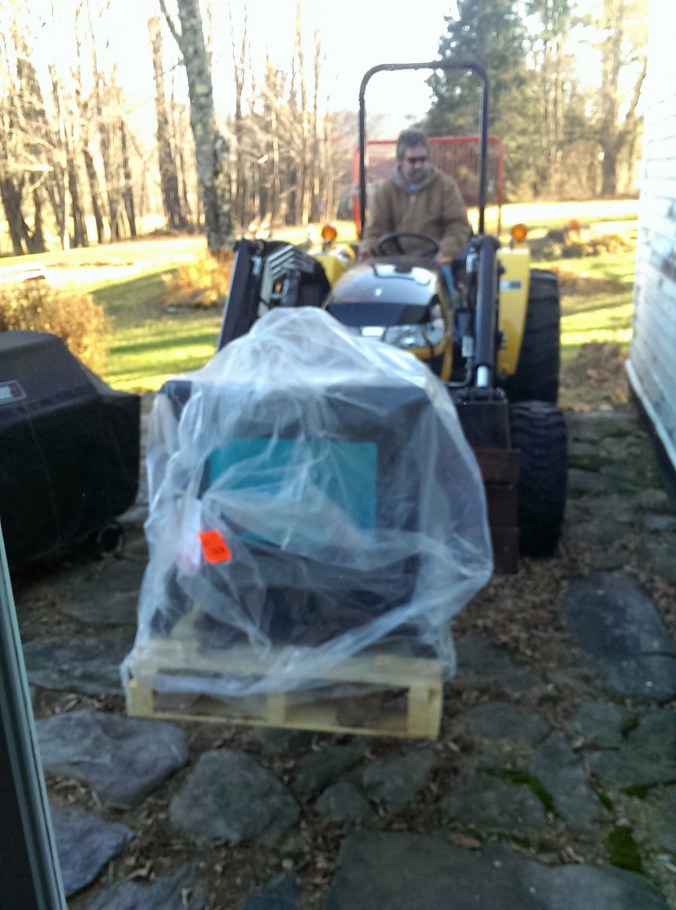
As soon as we got home BIll got the tractor out, took the stove off of the truck and unpacked it except for the pallet it was bolted to.  We decided the only way to get this into the kitchen was through the patio door.  Bill drove right onto the patio and approached the door only to find that it was too wide to fit in the door.  Damn, now what?

We decided to put it in lengthwise but the pallet was too narrow to hold it with any stability on the forks.  We stood in the yard trying to figure out how the two of us were going to get this inside and I just kept thinking WWDD? (what would Dad do).  I remembered there were two dollies in the barn that my father had used to move heavy things around. We got one and put it under the stove pallet, then picked it up.

131116 Stove (5)
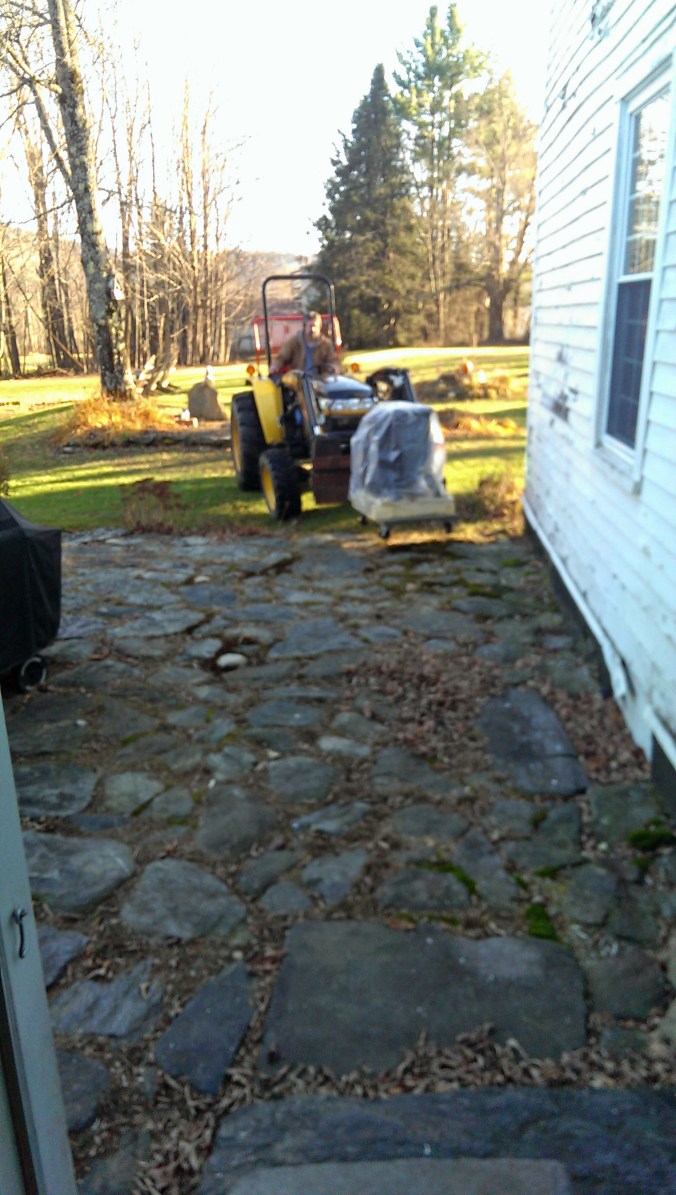
This pic is pretty blurry – probably because I was yelling at Bill while I was taking it.  When you are driving the tractor you have no way of knowing the height of the load you are carrying, especially when it is near the ground.  He came into the edge of the patio a little low and I could just imagine the sound as the stove hit the ground.  We were only able to get close enough to the doorway to set down the first set of wheels on the floor, he tipped up the forks to make it slide the rest of the way off, ran around into the kitchen and the two of us eased it off into the room.

131116 Stove (6)
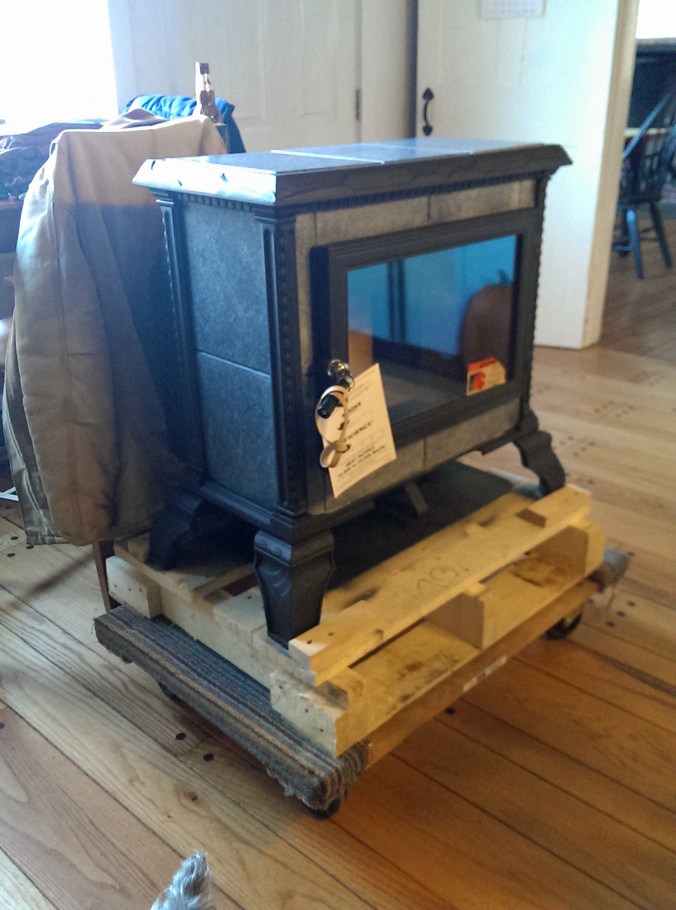
There it is all uncovered waiting for installation.  Honestly, that move took about 6 years off of my life it was so stressful.  Just writing about it raised my blood pressure.  440 pounds is really, really heavy – thank God for Dad’s little trolley (and remembering it was there).  Bill called Mike and made a date for Sunday morning to install it.

The first couple of hours of the installation on Sunday was spent wrapping the 25 feet of stove pipe with insulation and wire mesh.  They then went up on the roof and tried lowering it down the chimney.  Did I mention it was raining and we have a metal roof?  Yeah, even with ladders it was scary.  They were unable to get it up there and drop it down so decided to pull it up from the bottom.  We had been told that we would probably have to flatten some of the piping to go through the damper in the chimney but we were fortunate to have a damper that allowed the pipe to go through as is.  A rope was dropped from the top of the chimney and the pipe was pulled up and attached to the cap.  That was the easy part.

131116 Stove (7)
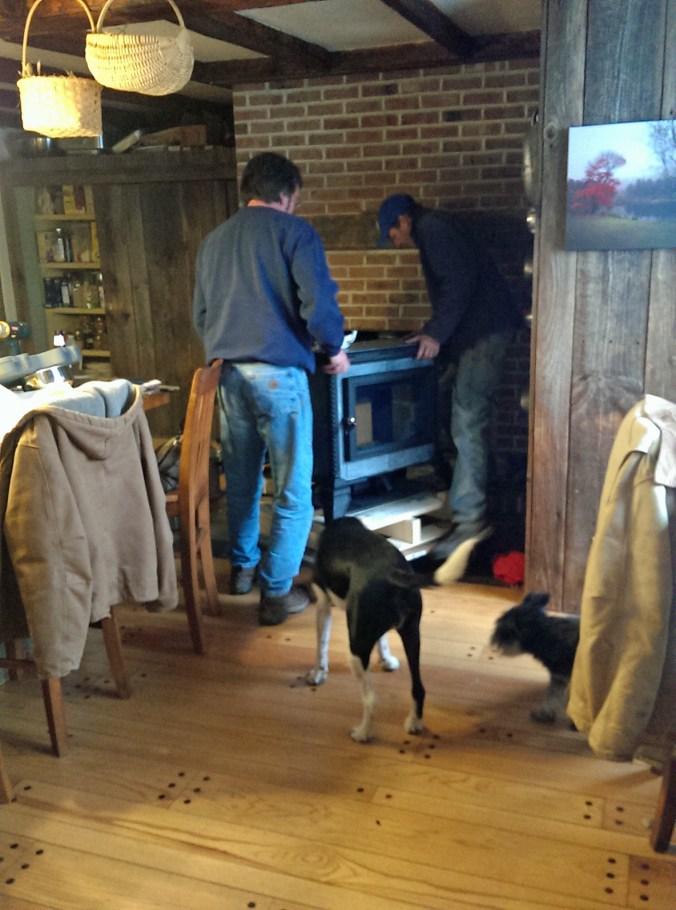
As they began to move the stove Mike told me we really needed four strong men, one for each corner.  We couldn’t think of any other guys to call so it was up to them.  Fortunately the dolly had placed the height of the stove just a little higher than the hearth.

131116 Stove (8)We had to do a lot of lifting and shimming to get this to work.  It had to be “walked” over because they could only lift it a little at a time.  Another stressful little period of time.

Getting all of this to fit together was another challenge.  There was a lot of fabrication going on in the garage and a trip to Wilmington to the hardware store for a piece of stovepipe that would finally enable the hookup.  There was a moment when it looked like this wasn’t going to happen without getting a different part for the back of the stove, a minute when they both walked away.  Some times you need those moments to walk away from a difficult situation to think of it in a different way.

Both guys were determined to build a fire in this before the day was over and figured out a way to connect all of the pipes in a safe way (not without a few more frustrating moments mind you).

At 2:45 Bill told me to light the first fire and this thing is everything I’d hoped it would be and more. In about an hour the temp in the room went from 55 to 76.  Bill thought that was a little too hot, I thought it was just right.  And it’s beautiful to boot.

131116 Stove (9)On our way back to Enfield Bill said this was probably the best home improvement we have done.  The heat in the kitchen never turns off once it really gets cold outside.  The stove is designed to have greatly reduced carbon emissions and will stay hot for 12 hours or so.  It should make a big difference in the oil bill.  What really amazed me was how efficient the burn was, once it was started we burned 3 good size pieces of wood in 3 hours and it was still burning when we left.  Sweet.